How I Use Silhouette Studio Designer Edition Plus with My Applique Designs
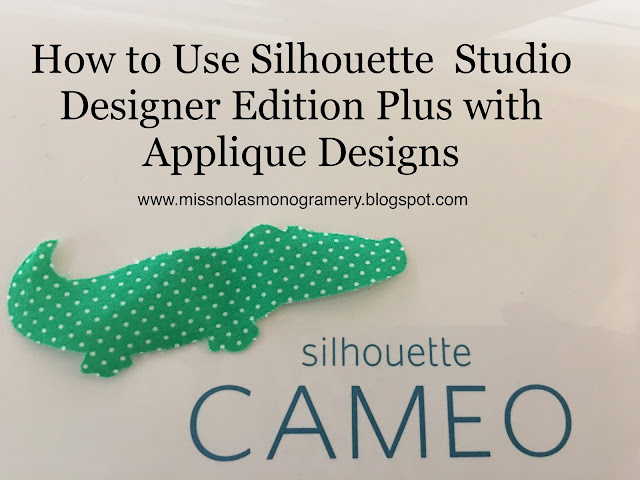 When deciding whether to upgrade my old Cricut to a newer machine or make the switch to a Silhouette Cameo, one of the deciding factors for me was the nice feature of being able to use my applique designs with Silhouette Studio Designer Edition Plus. The Designer Edition Plus is an upgrade feature to the Cameo's Silhouette Studio Software. It's downloadable at the Silhouette Store. In this software, I am able to open my embroidery applique designs from my computer and cut the fabric for it via my Silhouette Cameo.
Below I share with you the steps that I take in doing this. I am sure there are several other ways to do this process. This is my process.
(steps are below the photos)
This feature is only in Designer Edition Plus or higher.
In Silhouette Studio Designer Edition Plus, go under
FILE:
Open
Open up the folder where you store your embroidery applique designs.
I have mine located in Local Disk(C) in a folder called Designs for Embroidery as shown above.
In order to see your embroidery files, you must choose the file type. I use PES file type with my Brother PR 650. Click on Graphic Files Designer located a the bottom of the open window.
This step includes the two above photos.
A drop list will open of all the different types of files. Choose which one your machine uses. You can see I chose PES. Once you choose the file type all of your files should open. Choose which design you want to use.
Your design will open in Silhouette Studio Design Edition Plus like this. It will be there in all the layers of the applique design.
You may click on the design and drag away the top layer which is the satin stitch layer.
Once you have it completely free from the outline and tack down layer,
select that layer.
Once that layer is free from other layers and selected,
right click the mouse and cut it from your mat.
The next step is shown in the two above pictures.
This design had four layers. When I clicked the design again, I was able to drag away a layer that I could use to cut my fabric.
Once I had my layer that I could use, I selected what remained and right clicked with my mouse and cut it from the mat.
Notice the gap that is on the top of the tail. I need to connect that. If your design, leaves you with a gap, place the curser/mouse on the line of the design and quickly double click the mouse.
This will give you each point in the path of the blade. If I were to leave the gap the blade would not cut in the area that is disconnected.
I MUST CONNECT THE POINTS.
I zoom in close so the points do not look like they overlap. I then click on the last point which is right under the red point, and I drag it to connect with the next one. It's like connecting the dots.
Once I click my mouse again it releases the points, and I no longer have the gap.
I also want to make sure my fabric is cut just slightly larger than my design. In order to do that I am going to offset my design starting in the steps below.
I am going to choose, the offset tool. This is the updated Silhouette Studio 4. The tools are in the right margin.
I want to offset the design.
I want the smallest offset possible because otherwise the fabric could exceed the final satin stitches in my design. So I am going to decrease the distance of my offset to the lowest setting it will go which is .050.
For some reason, this version of Silhouette Studio gives an external offset AND an internal offset. See the triple lines of the design?
To get rid of the original copy and the internal copy select the design, right click your mouse and drop down to "release compound path". This will allow you to select the outer "external offset" copy of the design. See picture below.
Now you may place the curser/mouse on the external offset copy of the design.
Select it by clicking on the external offset copy which is the outer copy. Once it is selected, drag it way from the original and the internal copy.
Have it standing alone.
Now select the two copies of the design.
Once the copies are selected, you can right click the mouse and cut them
off of the mat.
Now the applique design is slightly larger than the original and should fit right over the outline layer or outline step. I am ready to cut my design.
I like to prep my fabric with Heat-n-Bond Light on the backside because once my applique is stitched out on to my item, I can iron it and the fabric will adhere to the item and lay down nicely. I put the HnBL onto the fabric prior to cutting it out. I leave the paper attached to the back of the fabric so it's really easy to peal away from the sticky mat. It will also keep the blade from making slight frays to my fabric.
I load my mat.
I set my material setting to "Fabric, Thin (Cotton Print)".
I choose Action: Tool 1, Cut (above1) and AutoBlade (above2).
I choose to view the job under "LINE" since it is just an one line outline design I am cutting. This also lets me view my settings: Material, Action, and Tool.
I like to double check my tool selection to make sure I have AutoBlade chosen.
I also choose to make a Double Pass on the cut. I want to make sure it cuts the fabric as well as the paper from the HnBL. Then I send it to the Silhouette.
Makes a nice cut all ready to lay on top of my outline stitch on my item. Before I lay it down within the outline, I do spray a little 504 adhesive spray on the back just so it will lay in place.
Please contact me if you have any questions concerning this pictorial.




Comments
Post a Comment